Over the last few years I have repeatedly dedicated myself to GPS navigation with a smartphone. The accuracy required for determining location is quite sufficient for hiking with current models. Since I myself have only been using Android-based smartphones for several years, I will only refer to those in this article. OsmAnd+ is now also available for iOS, but whether this app offers an identical range of features as the Android version is not known to me.
During this time I tested Maps.me, Gaia GPS, Locus Maps, Google Maps and Orux among others for their suitability for hiking and trekking. Yet for over a year now I have ended up using solely OsmAnd+ for this use case and wouldn't want to do without it. So that you don't have to go through the same process, let me introduce you to my favorite and go into detail on the features I have come to appreciate the most.
OsmAnd+ consists of an application and several plugins. I use the OsmAnd+ main program, which currently costs €6.99 and the plugin for contour lines and relief for €2.39. The maps of OsmAnd+ are divided by continent/country/region and are available free of charge. It must be mentioned that download servers are unfortunately very slow during the day. Therefore it is better to download the maps overnight.
After OsmAnd+ and the contour lines plugin are installed, they first need to be configured. The default settings are, in my opinion, not suitable for our purpose.
Configuration
First of all it is recommended to adjust the path for the maps. I placed it on the smartphone's SD card so that the internal storage of the smartphone is not reduced by the maps.
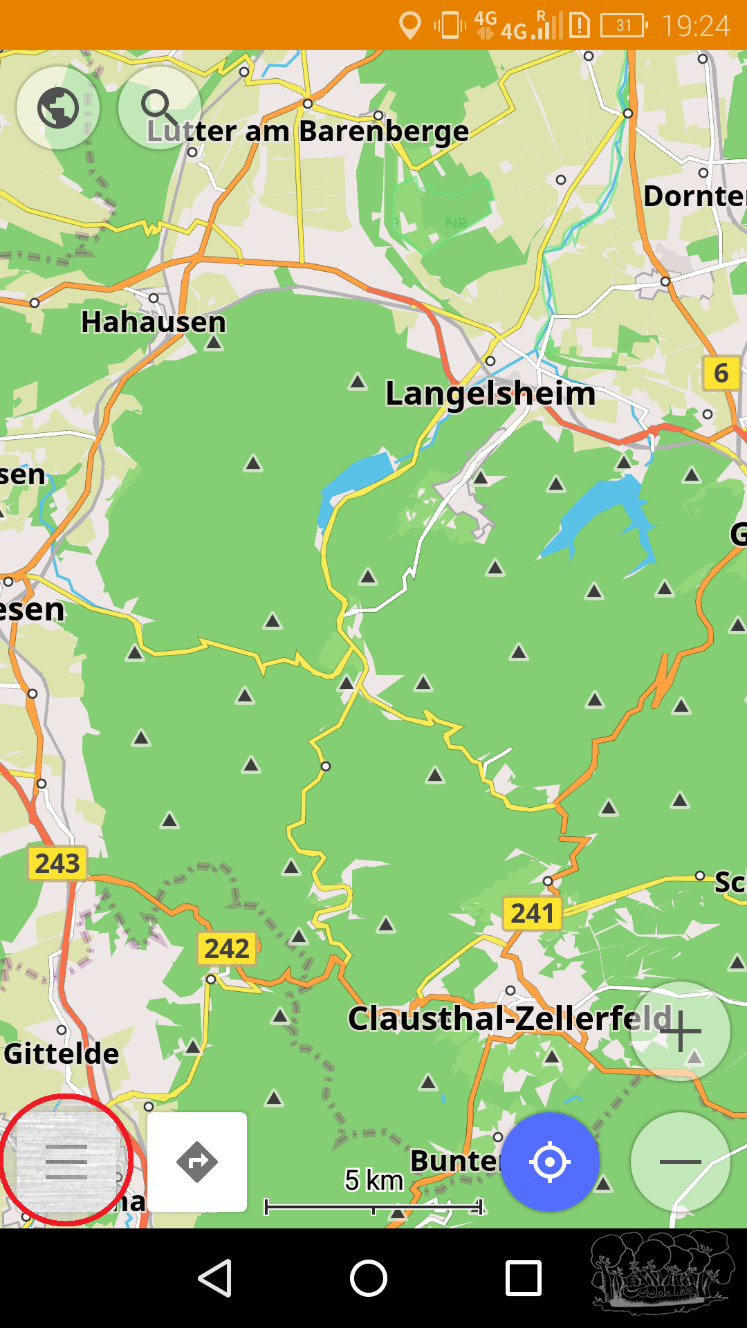
To do this, after starting the app, press the button with the three horizontal lines at the bottom left.
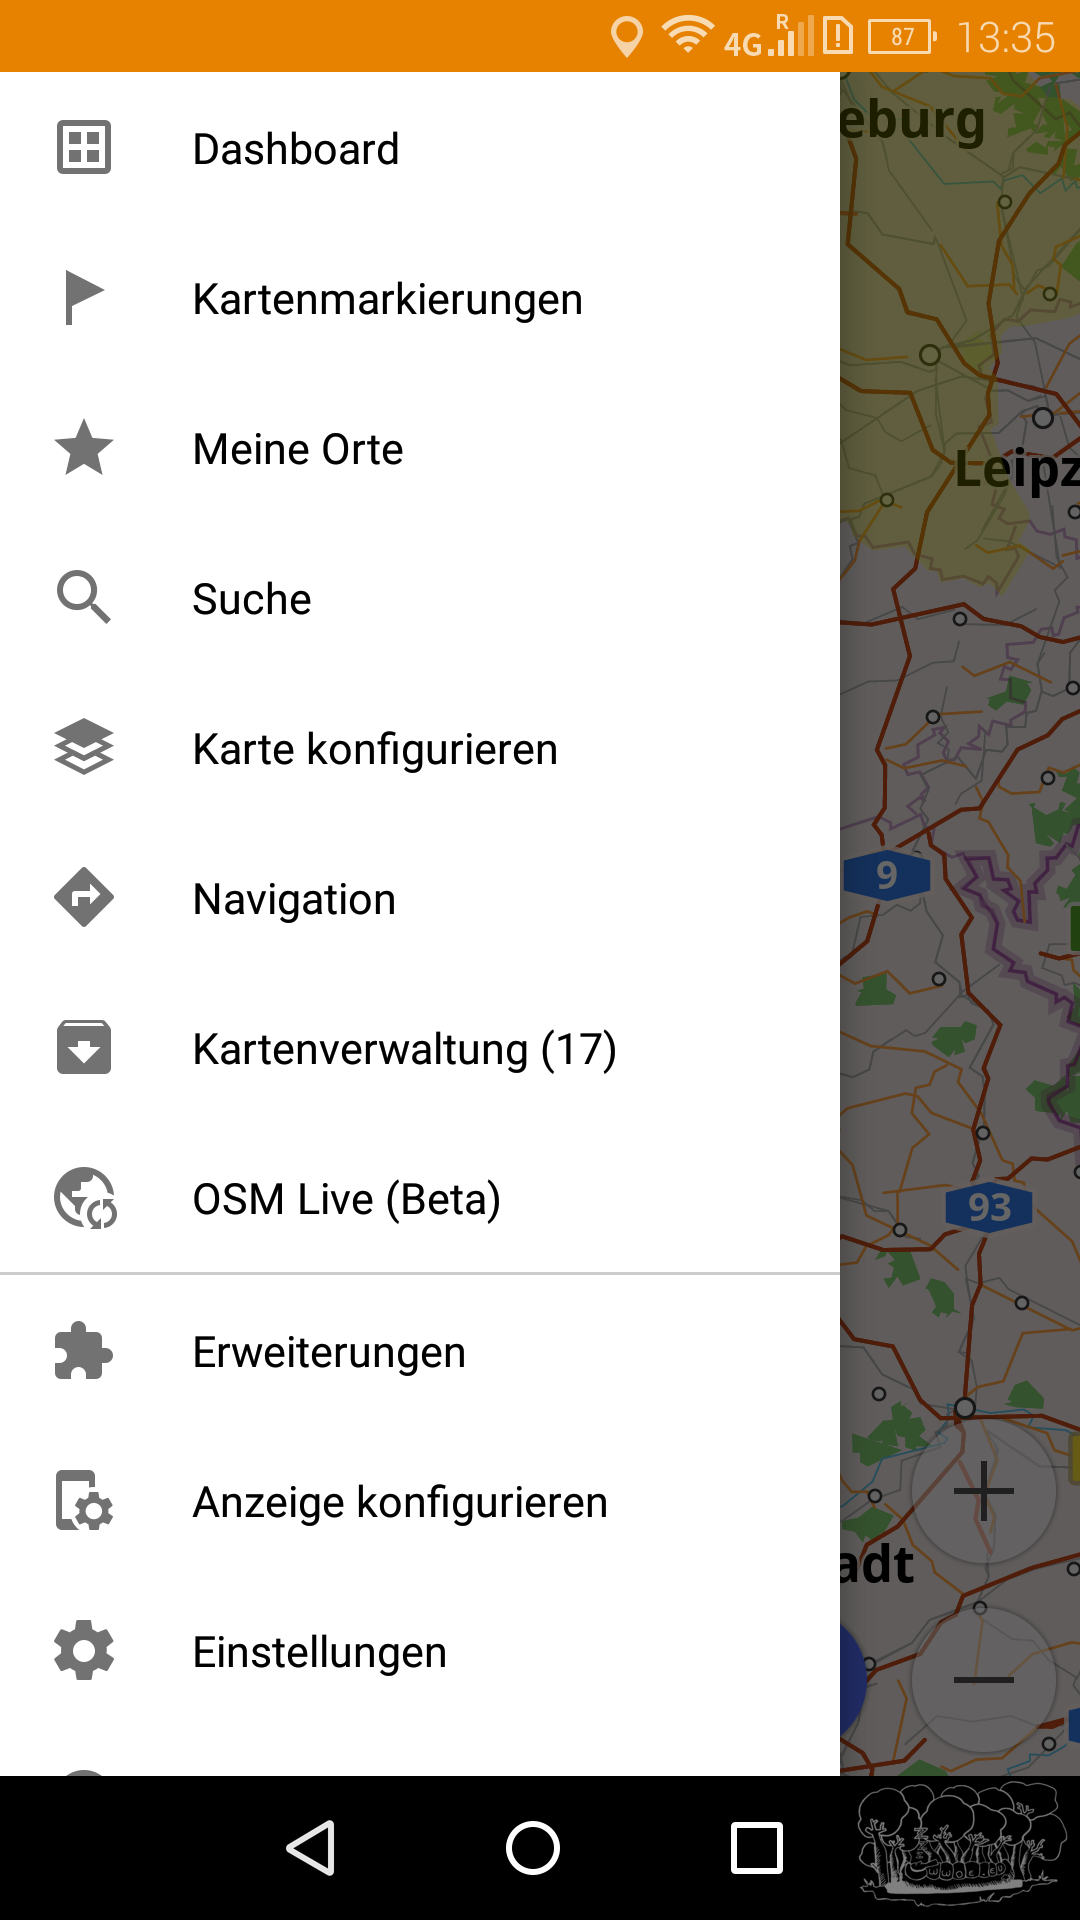
Now a menu with various options opens. In the following text this menu will henceforth be called the burger menu.
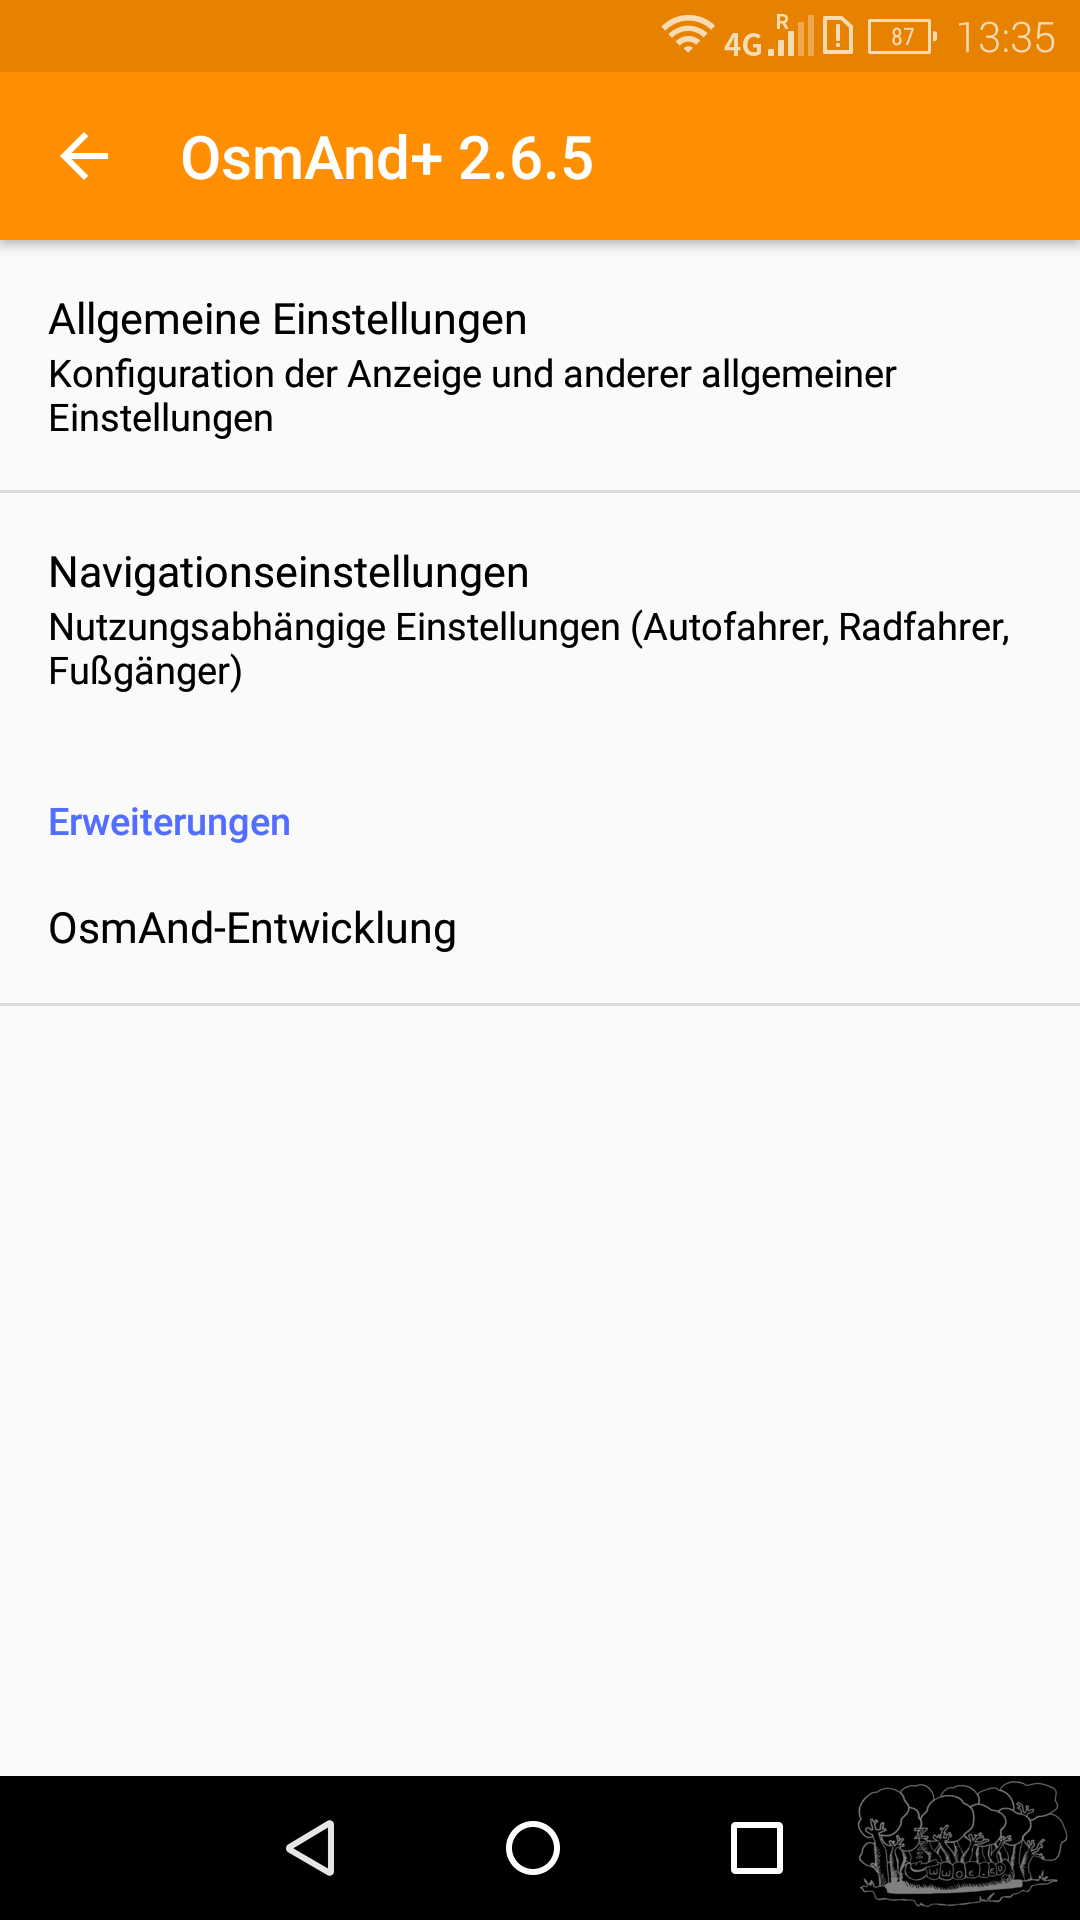
In this menu we select the menu item “Settings”. In the following menu item the “General Settings” are to be selected.
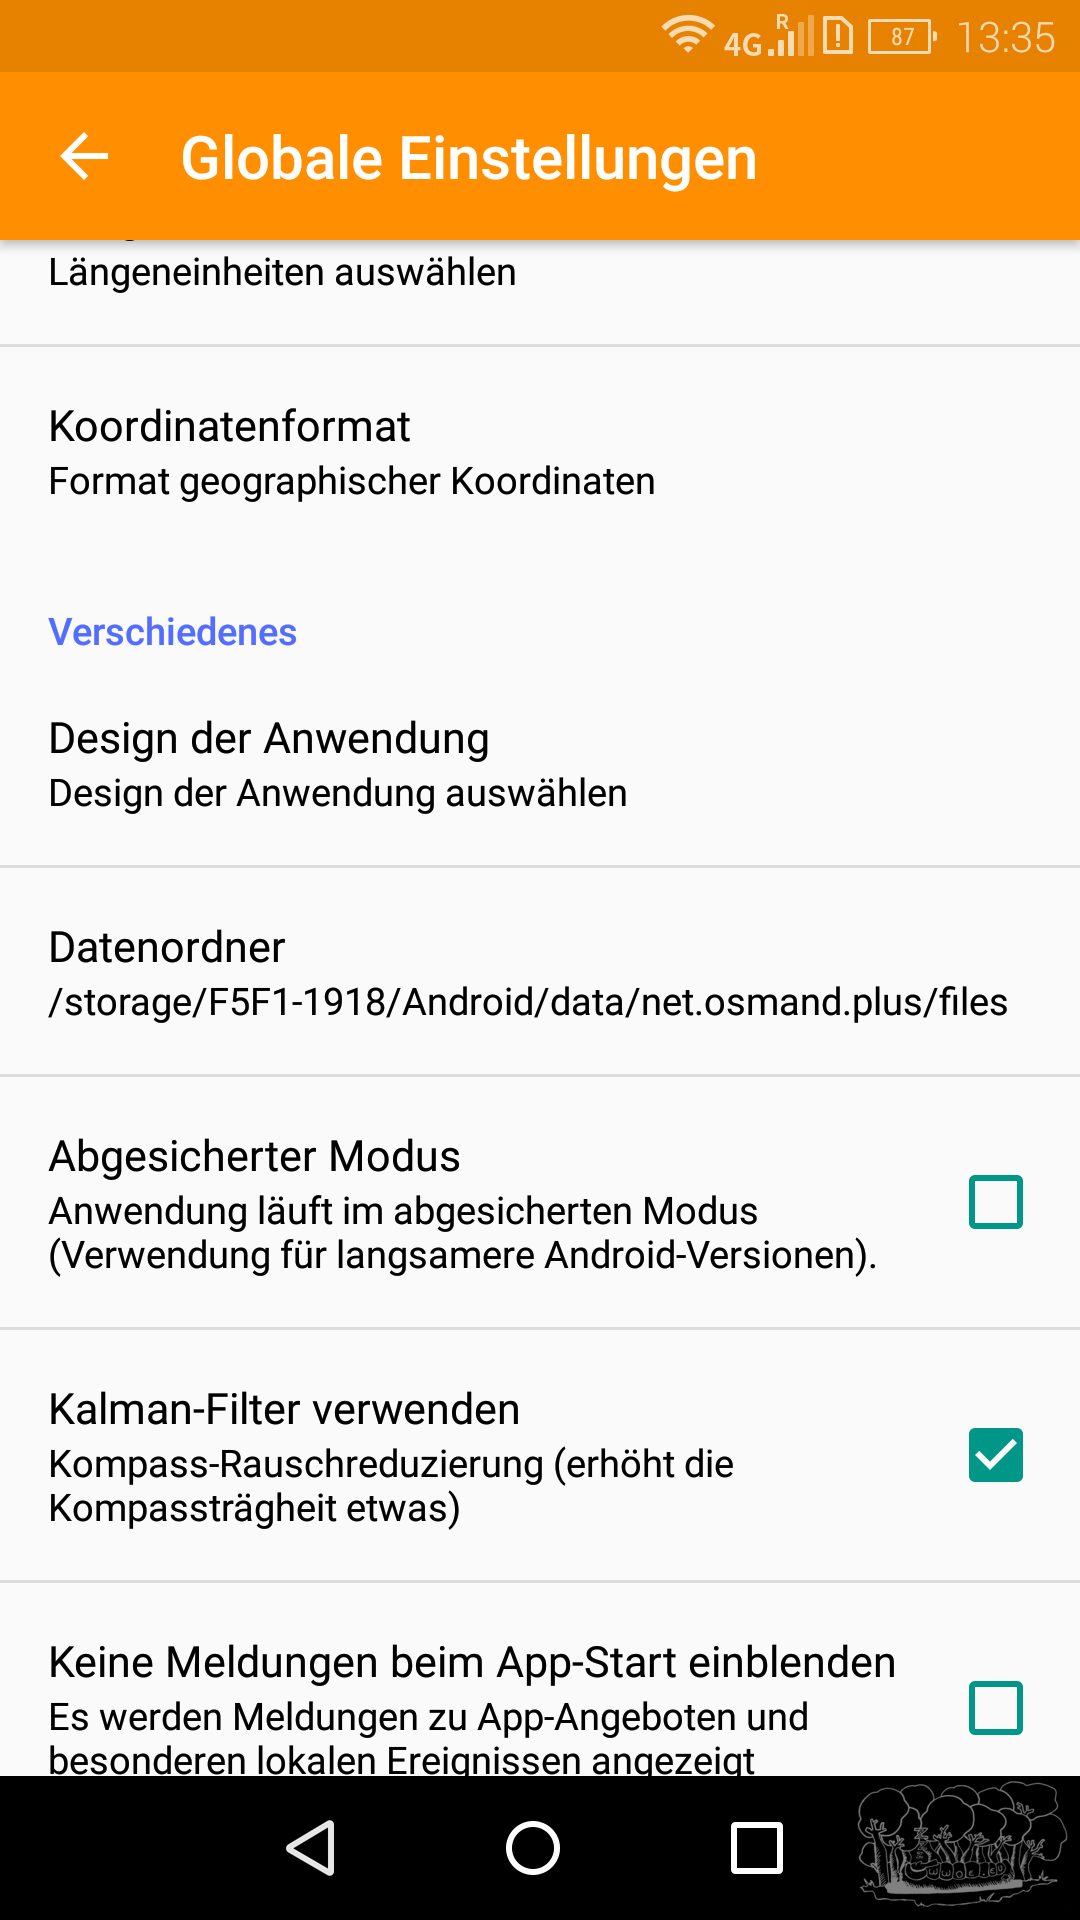
To select the storage folder we scroll down a bit to the item “Data folder”. After pressing the menu entry we can select a folder on the smartphone’s memory card in which maps and similar data are to be stored in the future.
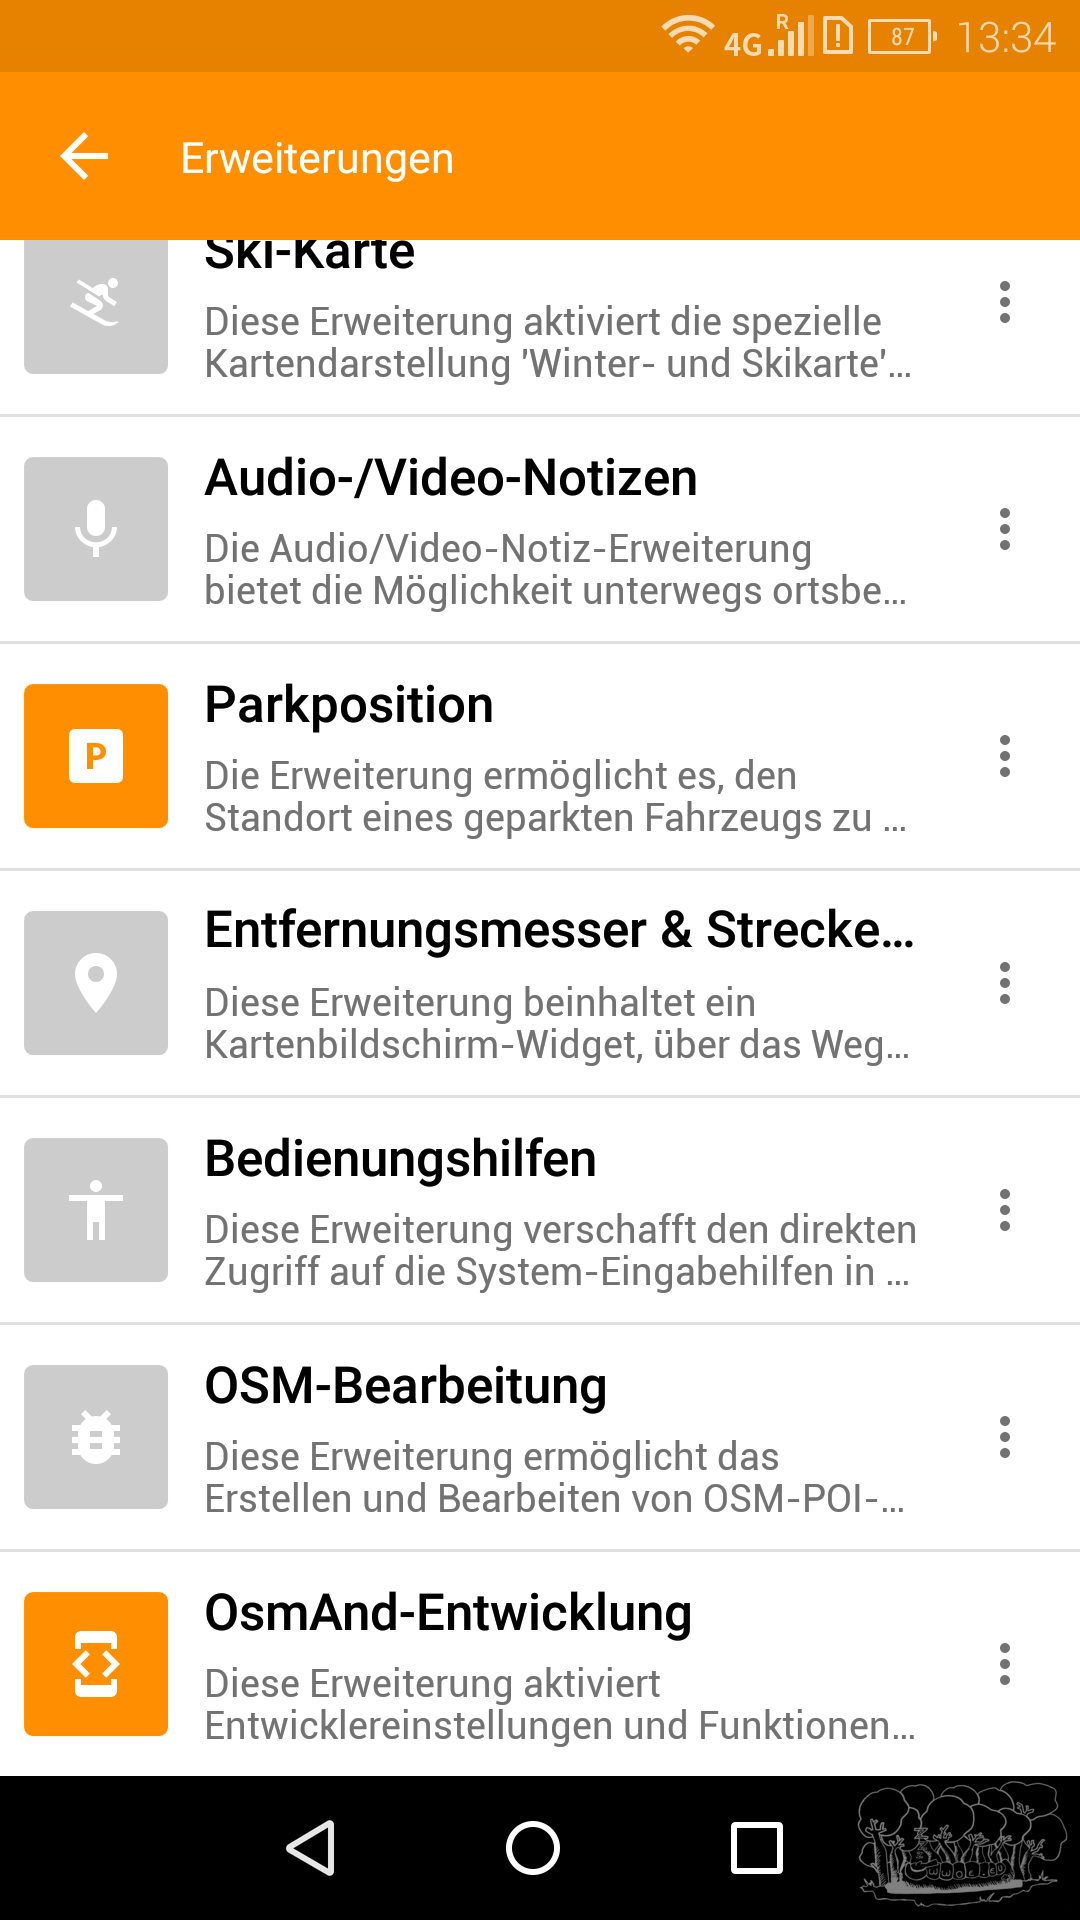
Next we activate the new extensions; to do this we go back to the burger menu and go to the menu item Extensions. In this menu item we can activate the various plugins.
Here we activate the previously purchased contour lines plugin and the OsmAnd development plugin.
Clicking on the “OsmAnd development plugin” opens the overview page for this plugin.
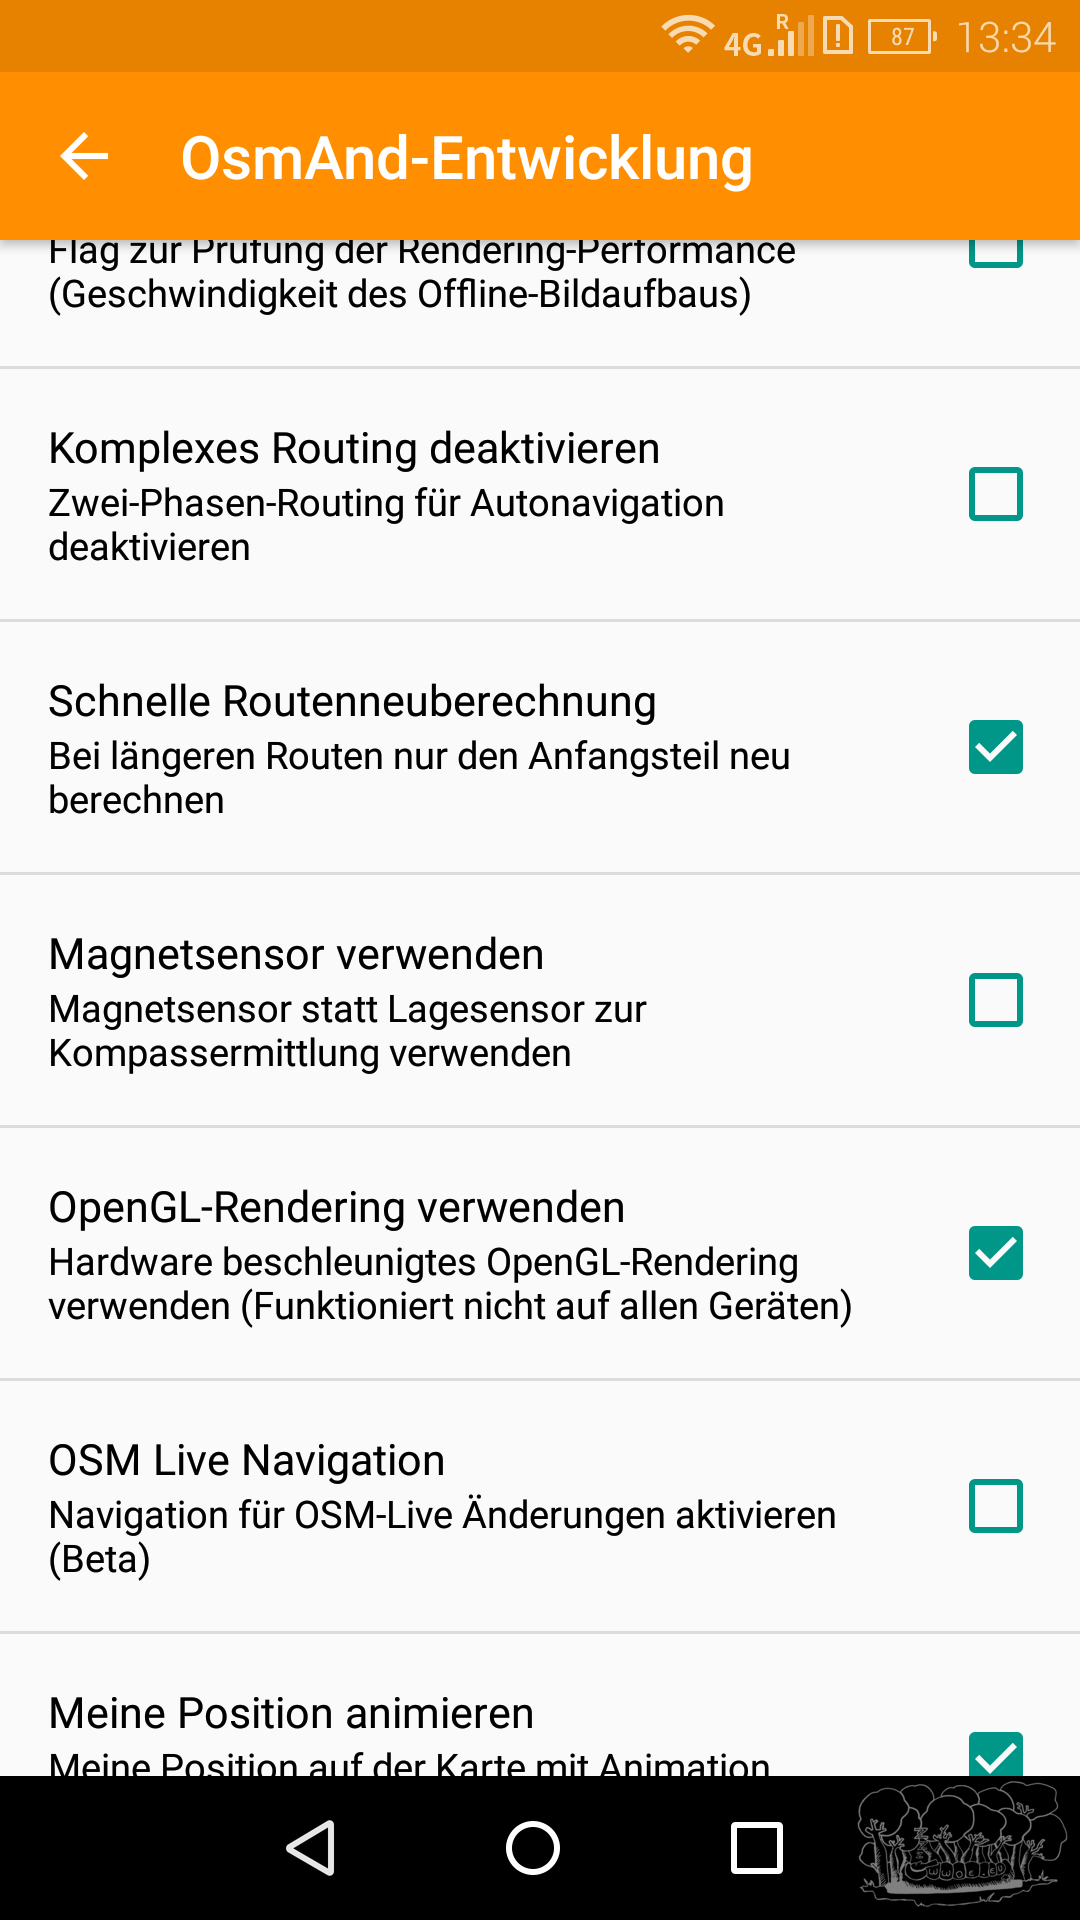
From there we get to the settings of the plugin.
Here we activate the function “Fast route calculation”, “Use OpenGL rendering”.
By activating this function the software becomes significantly faster at calculating routes and displaying maps. Additionally the OpenGL rendering saves some power during display. It may be that the OpenGL rendering function does not work on your smartphone. In that case you have to deactivate it again and live with a reduced speed when displaying the map.
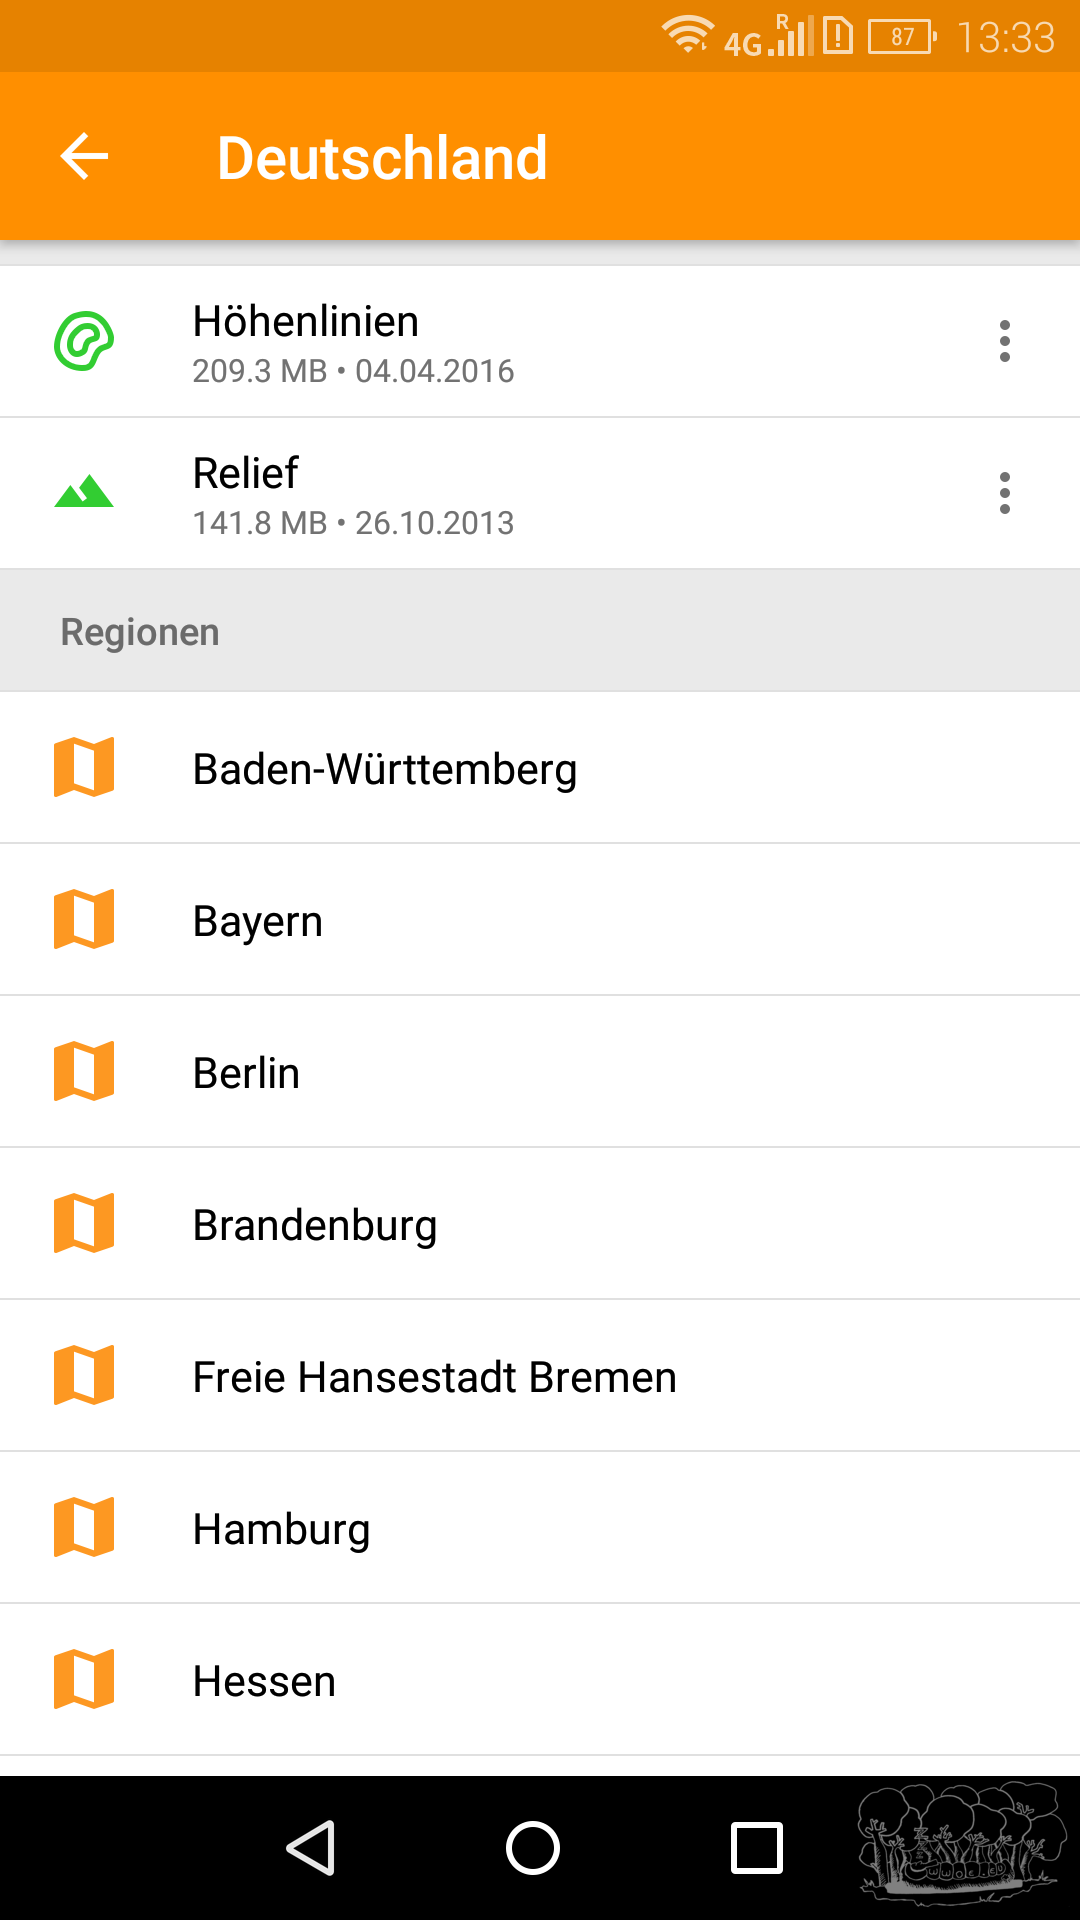
Now the necessary configuration adjustments are, in my opinion, done and the program can be used. First it makes sense to download maps of the desired region. To do this we go back to the burger menu and use the option “Map management”. In this menu we download the desired maps.
For example “Europe” -> “Germany” -> “Lower Saxony”. Additionally the Germany-wide maps “Contour lines” and “Relief”. The maximum number of maps used is only limited by the storage space of the smartphone.
I personally have the maps of all of Germany and the holiday countries I will be visiting in the near future on my smartphone.
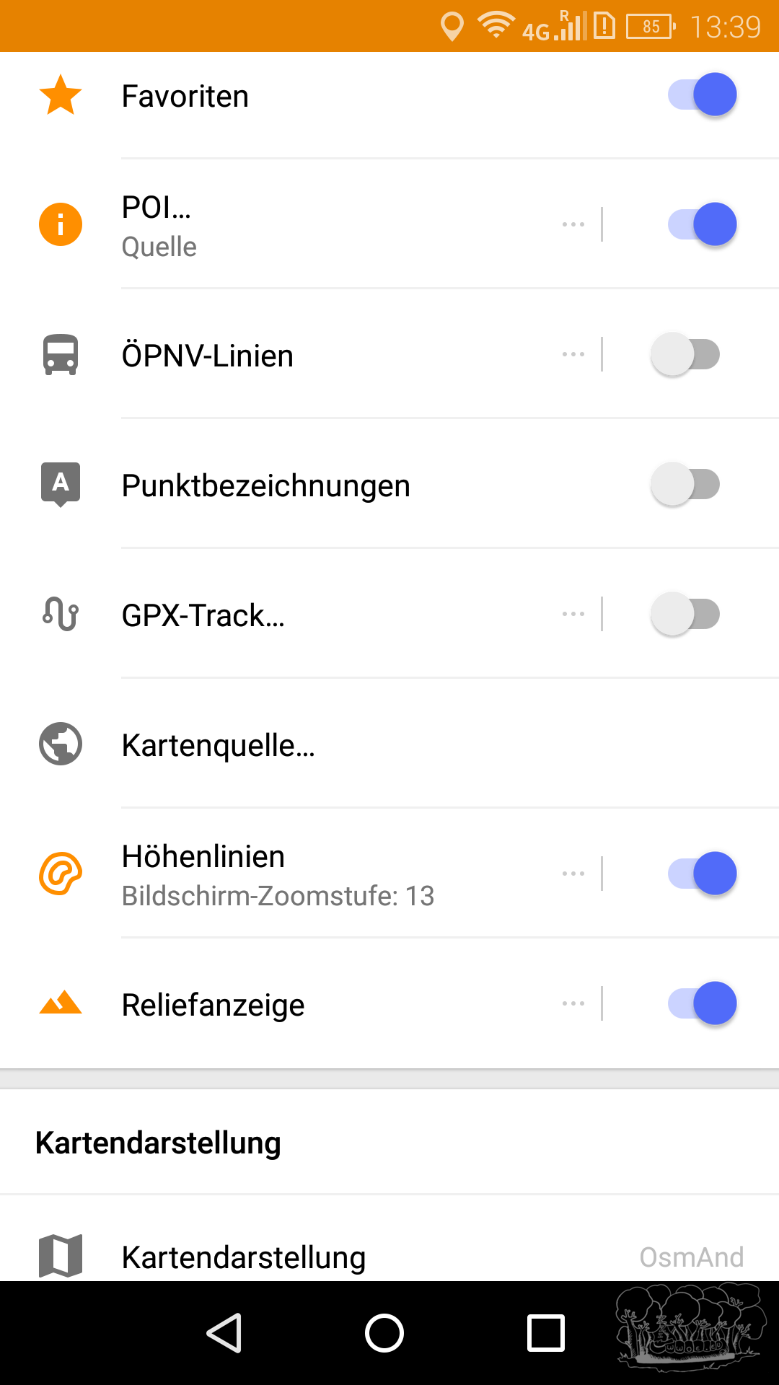
So that the relief and contour lines are displayed they must first be activated. To do this select the item “Configure map” in the burger menu. In this menu you can set which objects are to be additionally displayed on the map. This setting can be set differently for Global (globe) or in routing mode for car, bicycle and pedestrian. In the global settings we activate the contour lines and relief display.
Useful features
Since I have now tried out various apps I will name three criteria below in which I believe OsmAnd+ is clearly ahead of the other GPS apps. OsmAnd+ not only meets my basic requirements but also offers me useful functions that make hiking easier for me.
Displaying GPX tracks
With OsmAnd+ you can quite easily display GPX tracks on the map.
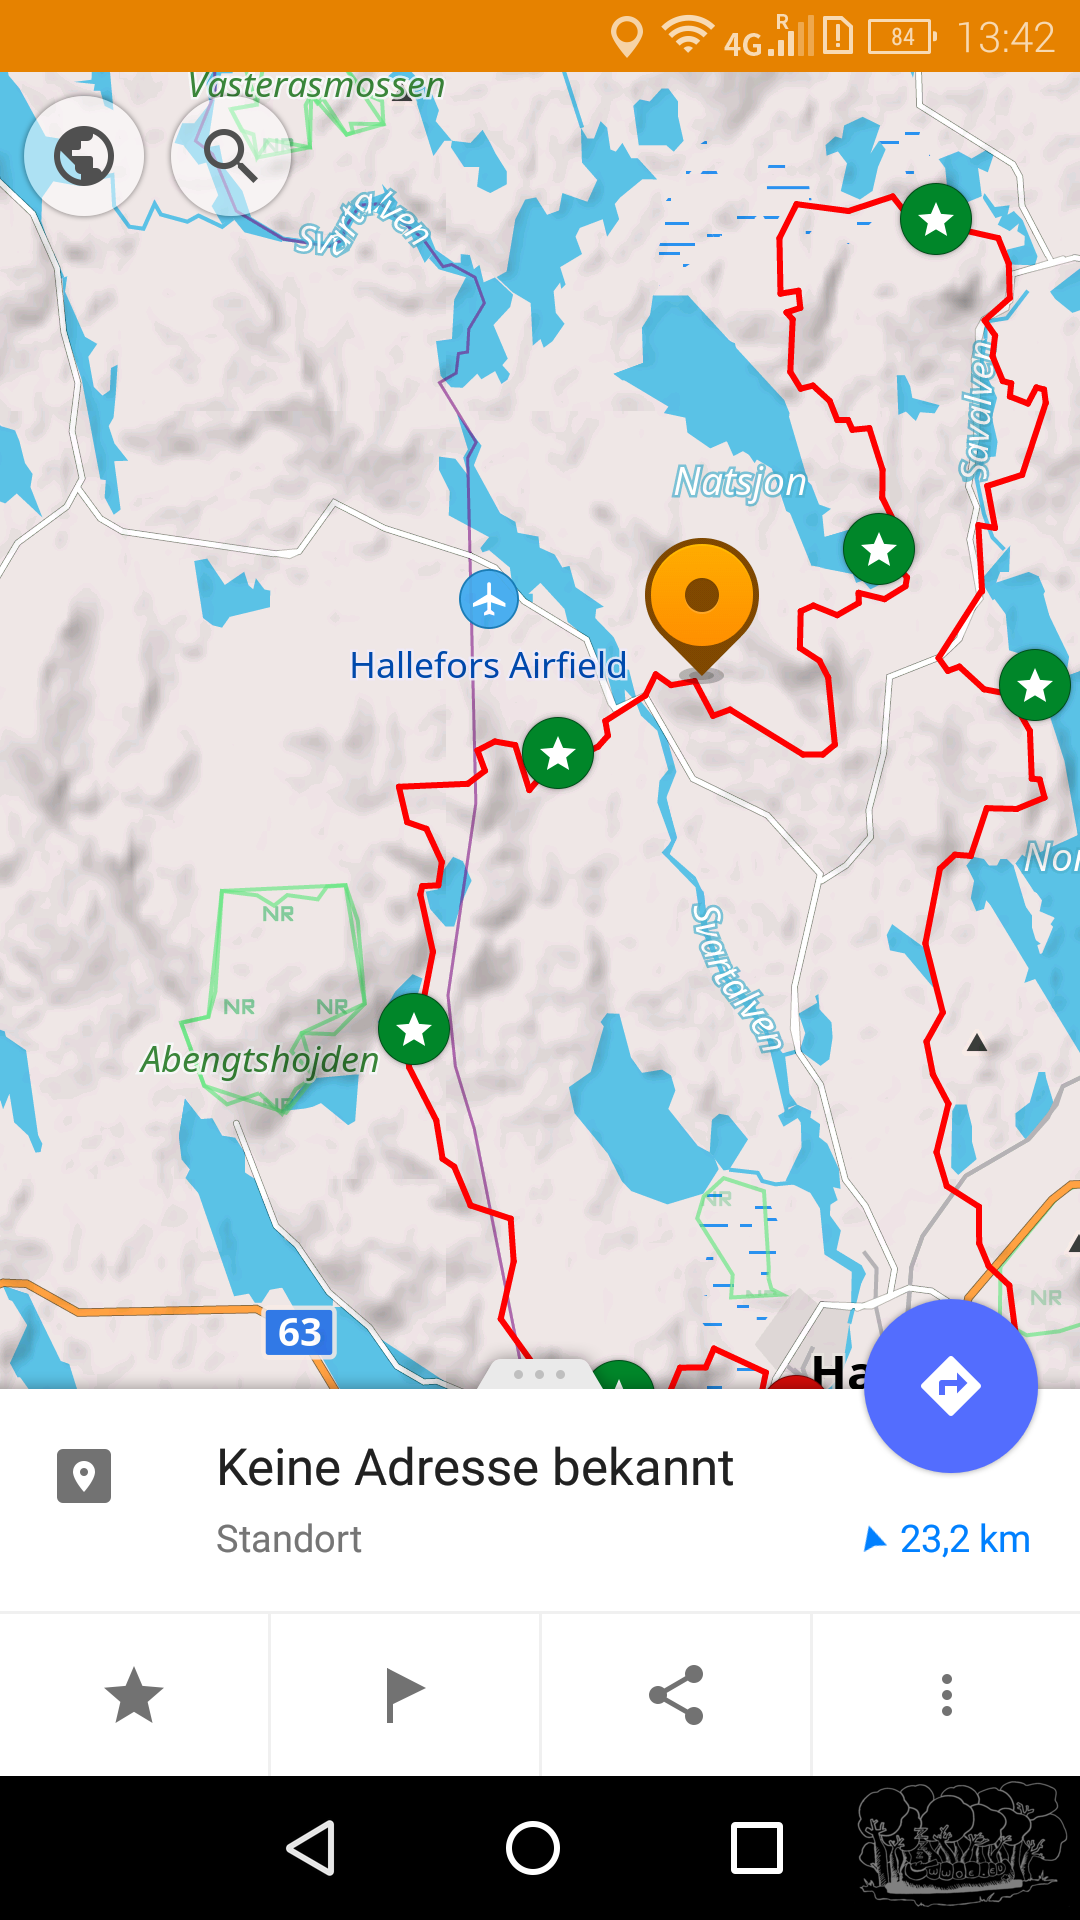
To configure this you have to open the burger menu again and go to “Configure map”. In the following menu you will find various groups that can be displayed on the map. Here we select the map settings again from the burger menu. In the global tab we activate the GPX track with a click. There the previously added GPX tracks can be individually displayed and deactivated. If the track is not yet known it can be added to the list via the “Add track” button.
Routing
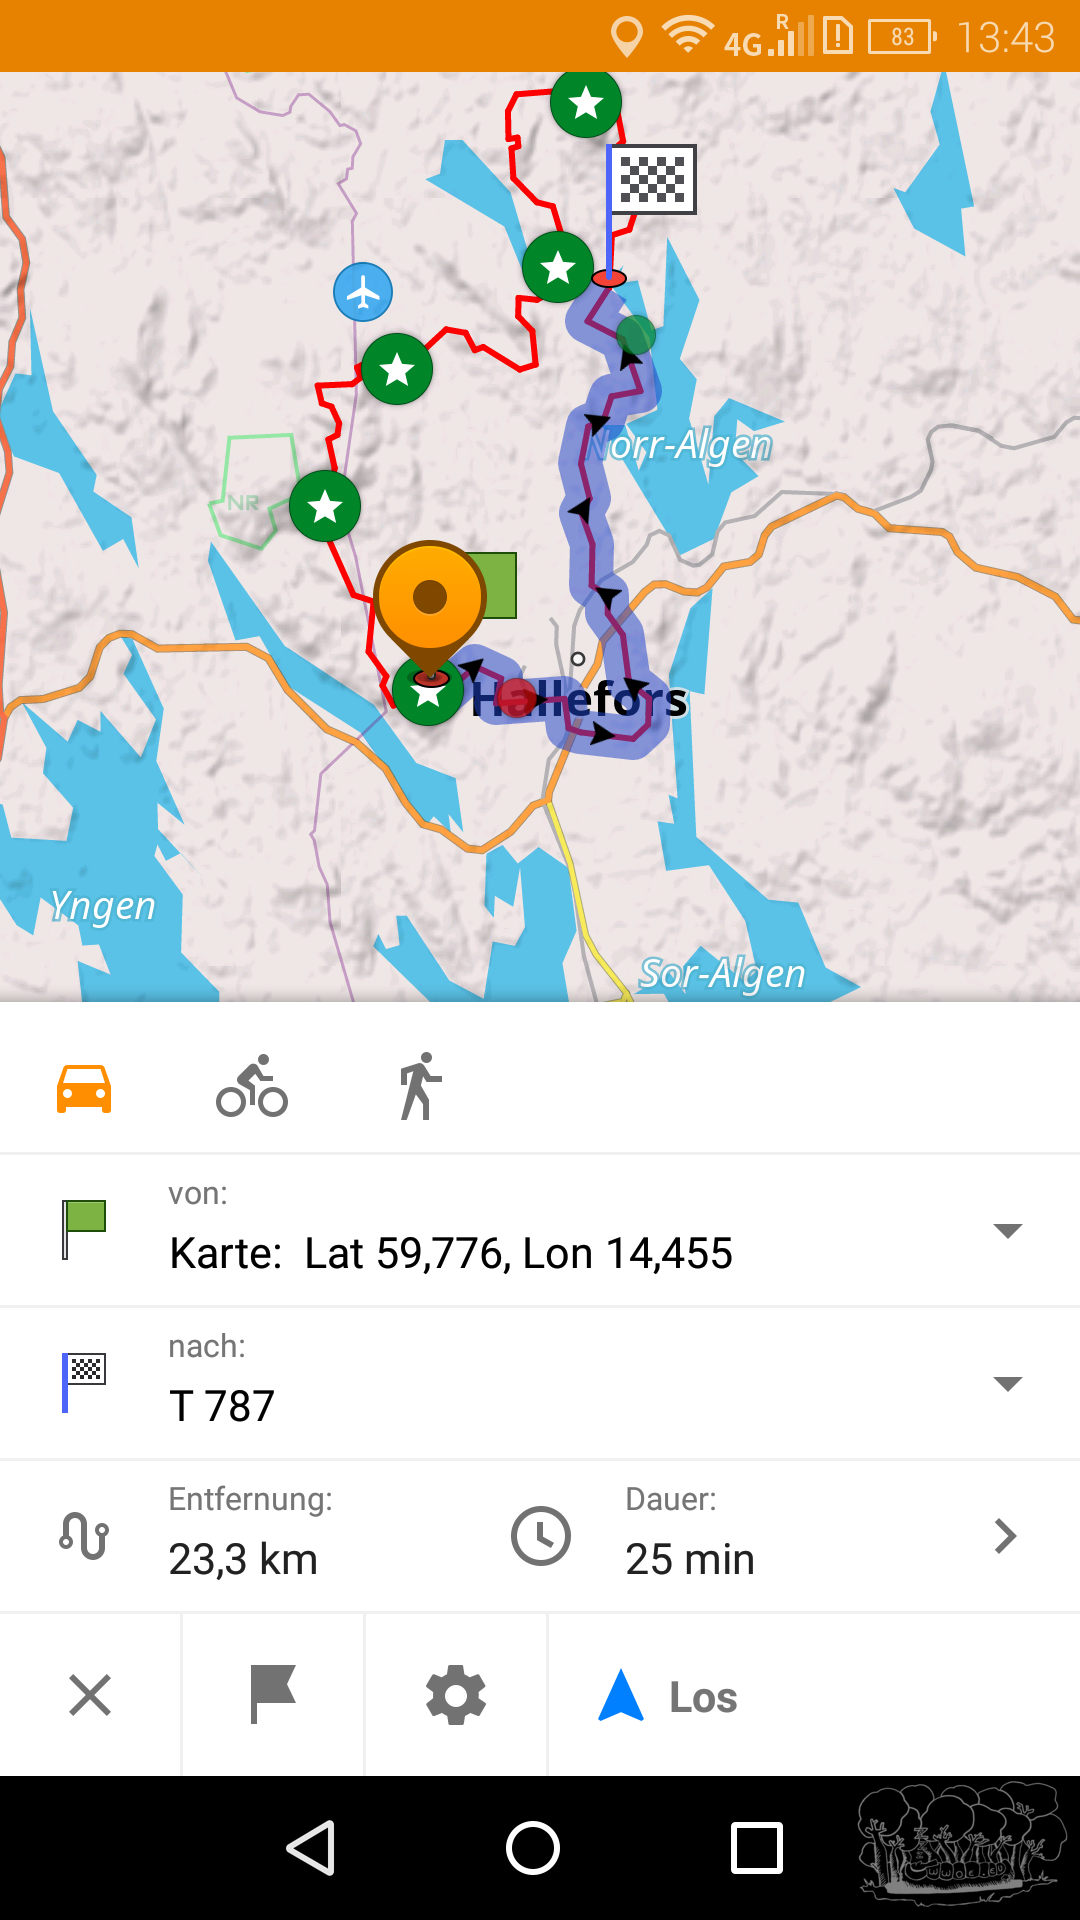
To navigate to a point you can use the routing function. To do this press on the desired destination point for a longer period of time.
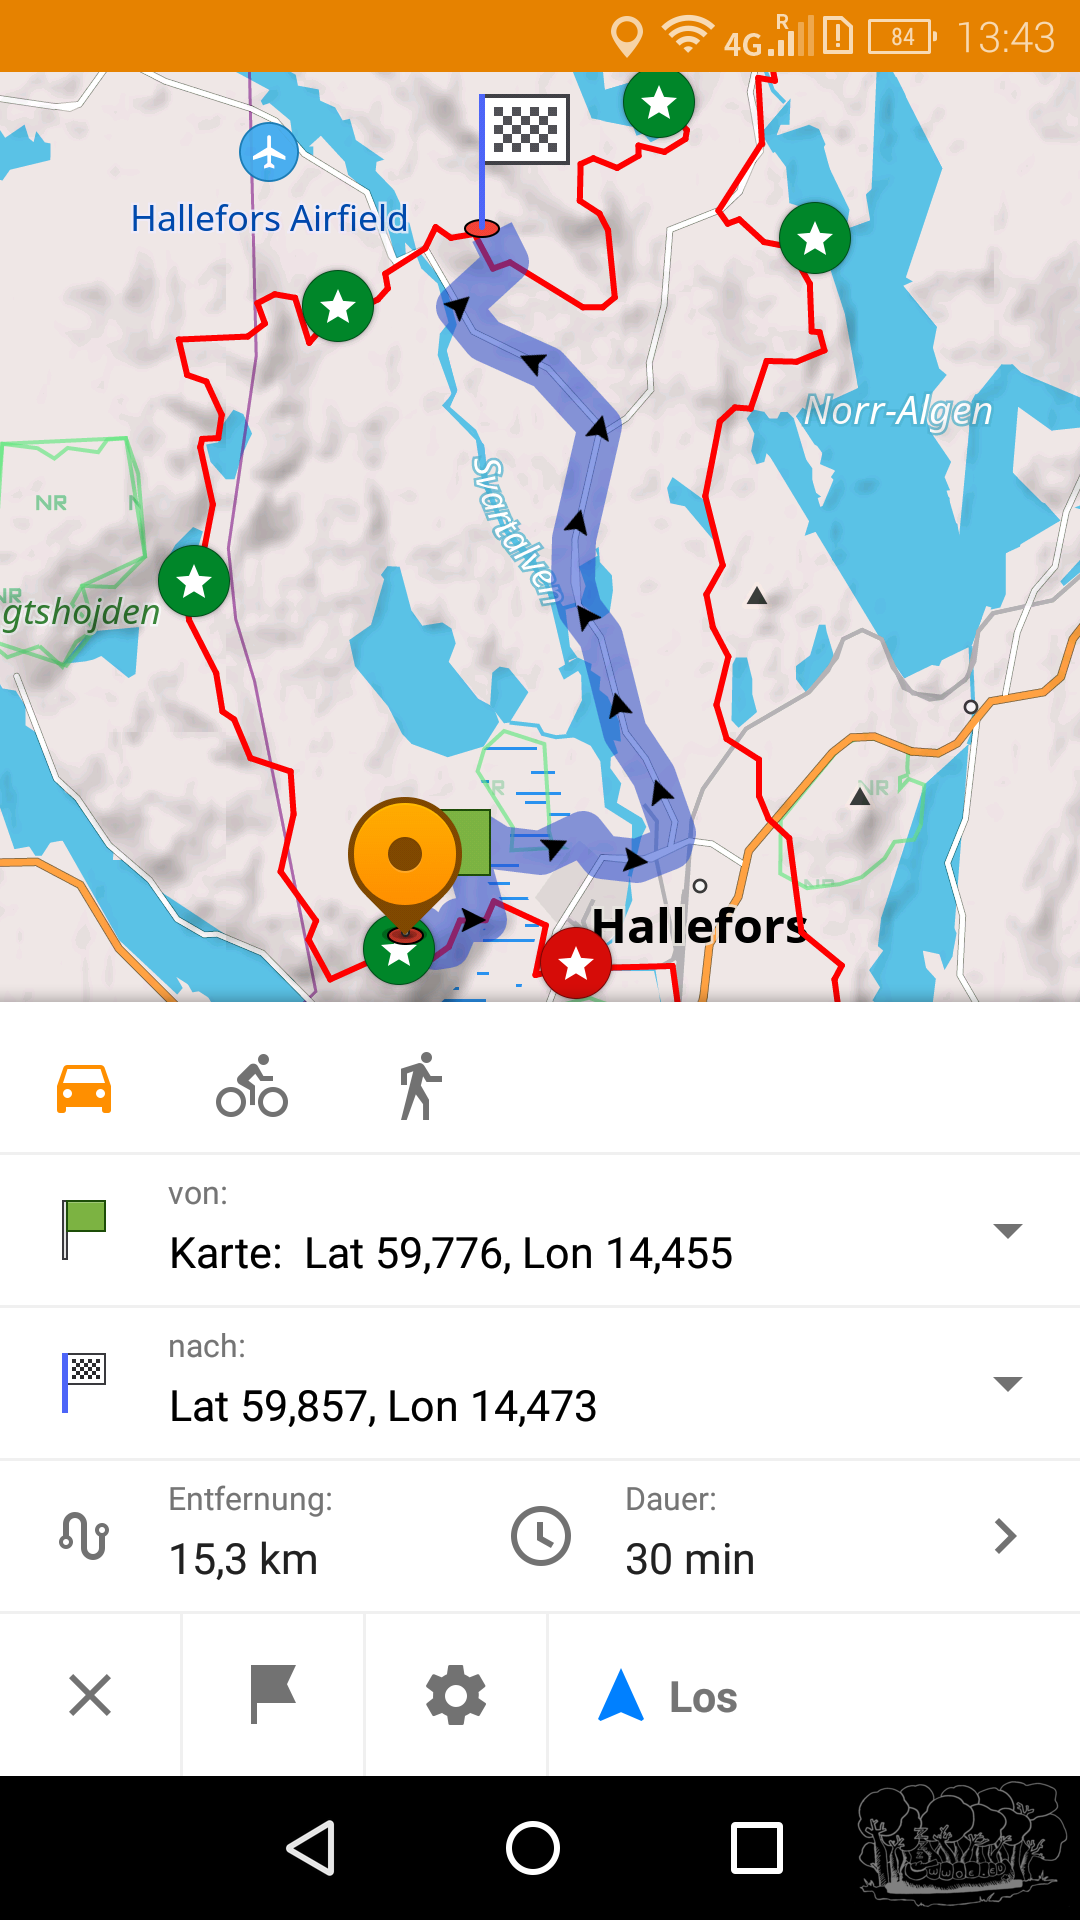
This point is now marked with an orange circle with an arrowhead. A click on the blue circle with a bent arrow opens the routing menu for this point. In this menu you can now set how you are traveling. By car, bike or on foot. This influences the paths used or preferred.
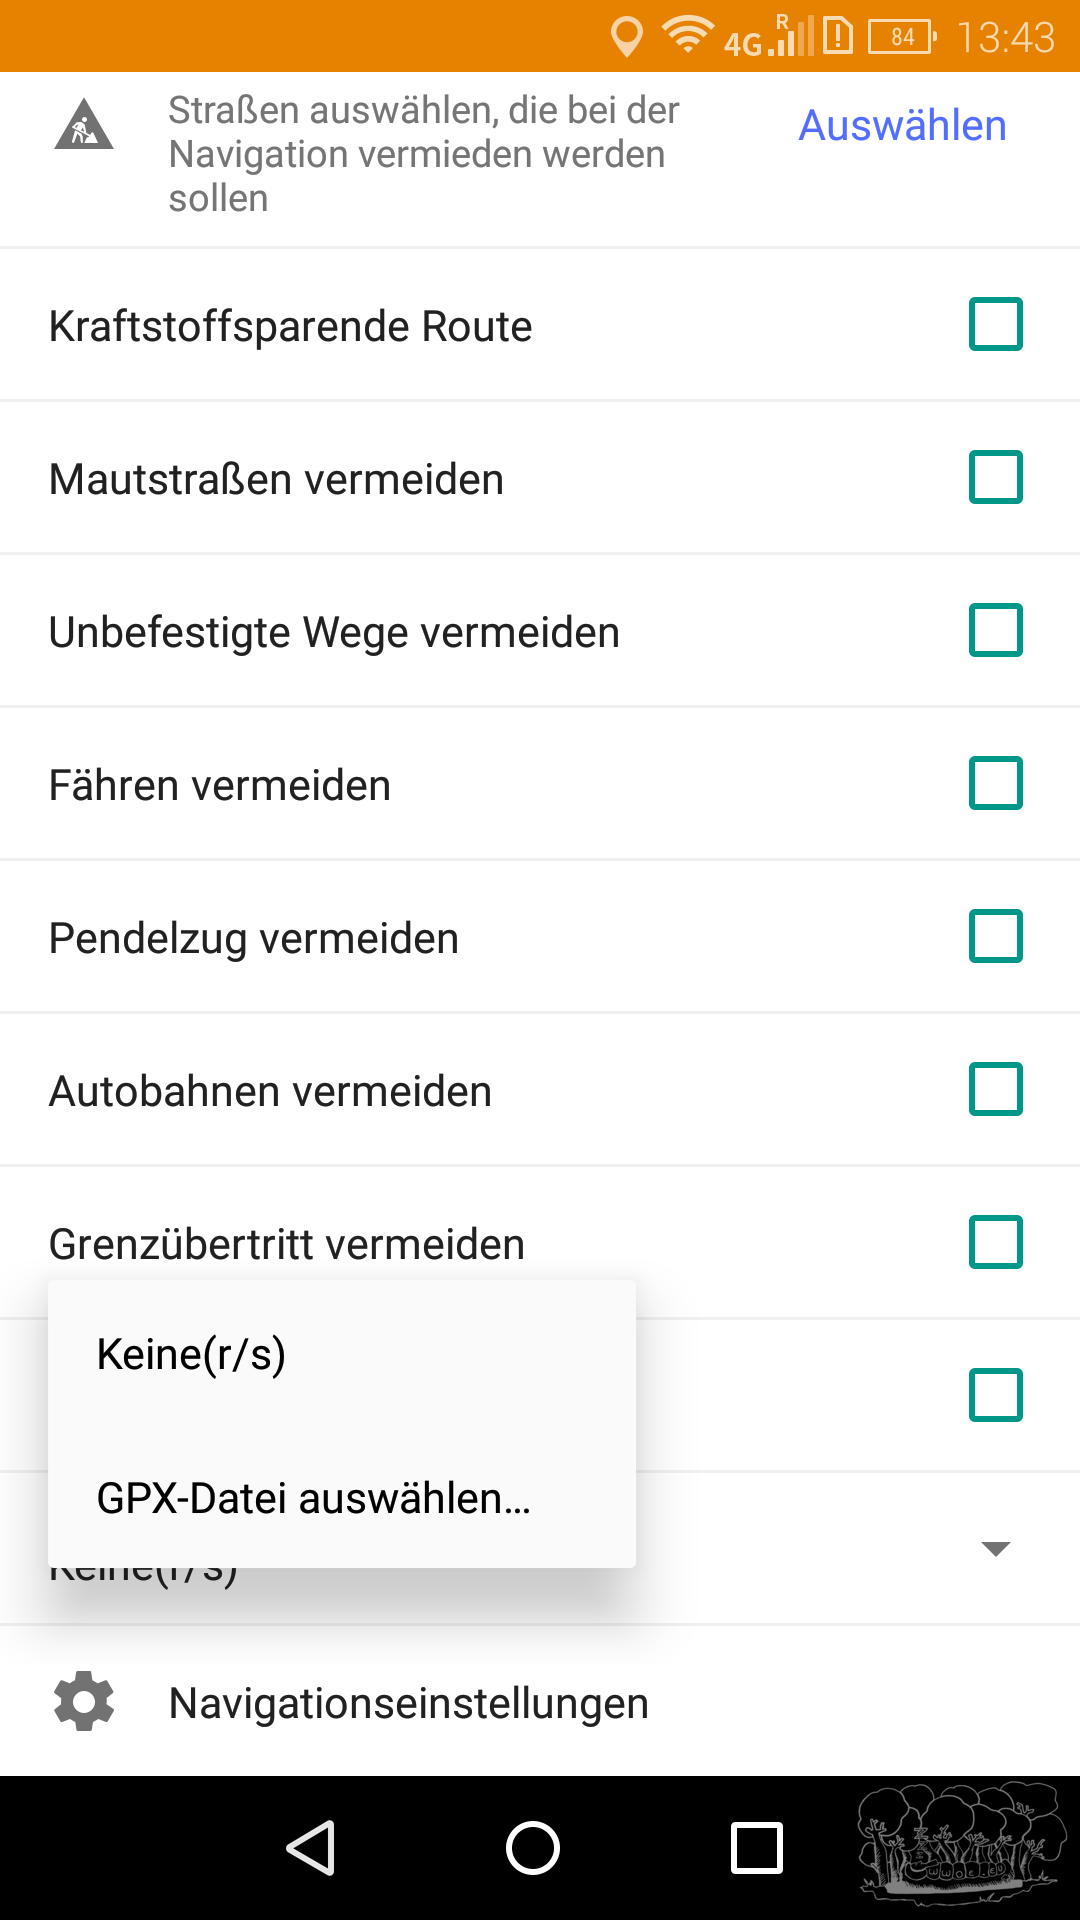
Via the gear wheel you get to the settings menu. In this menu the route guidance can be adjusted by avoiding highways, toll roads and similar.
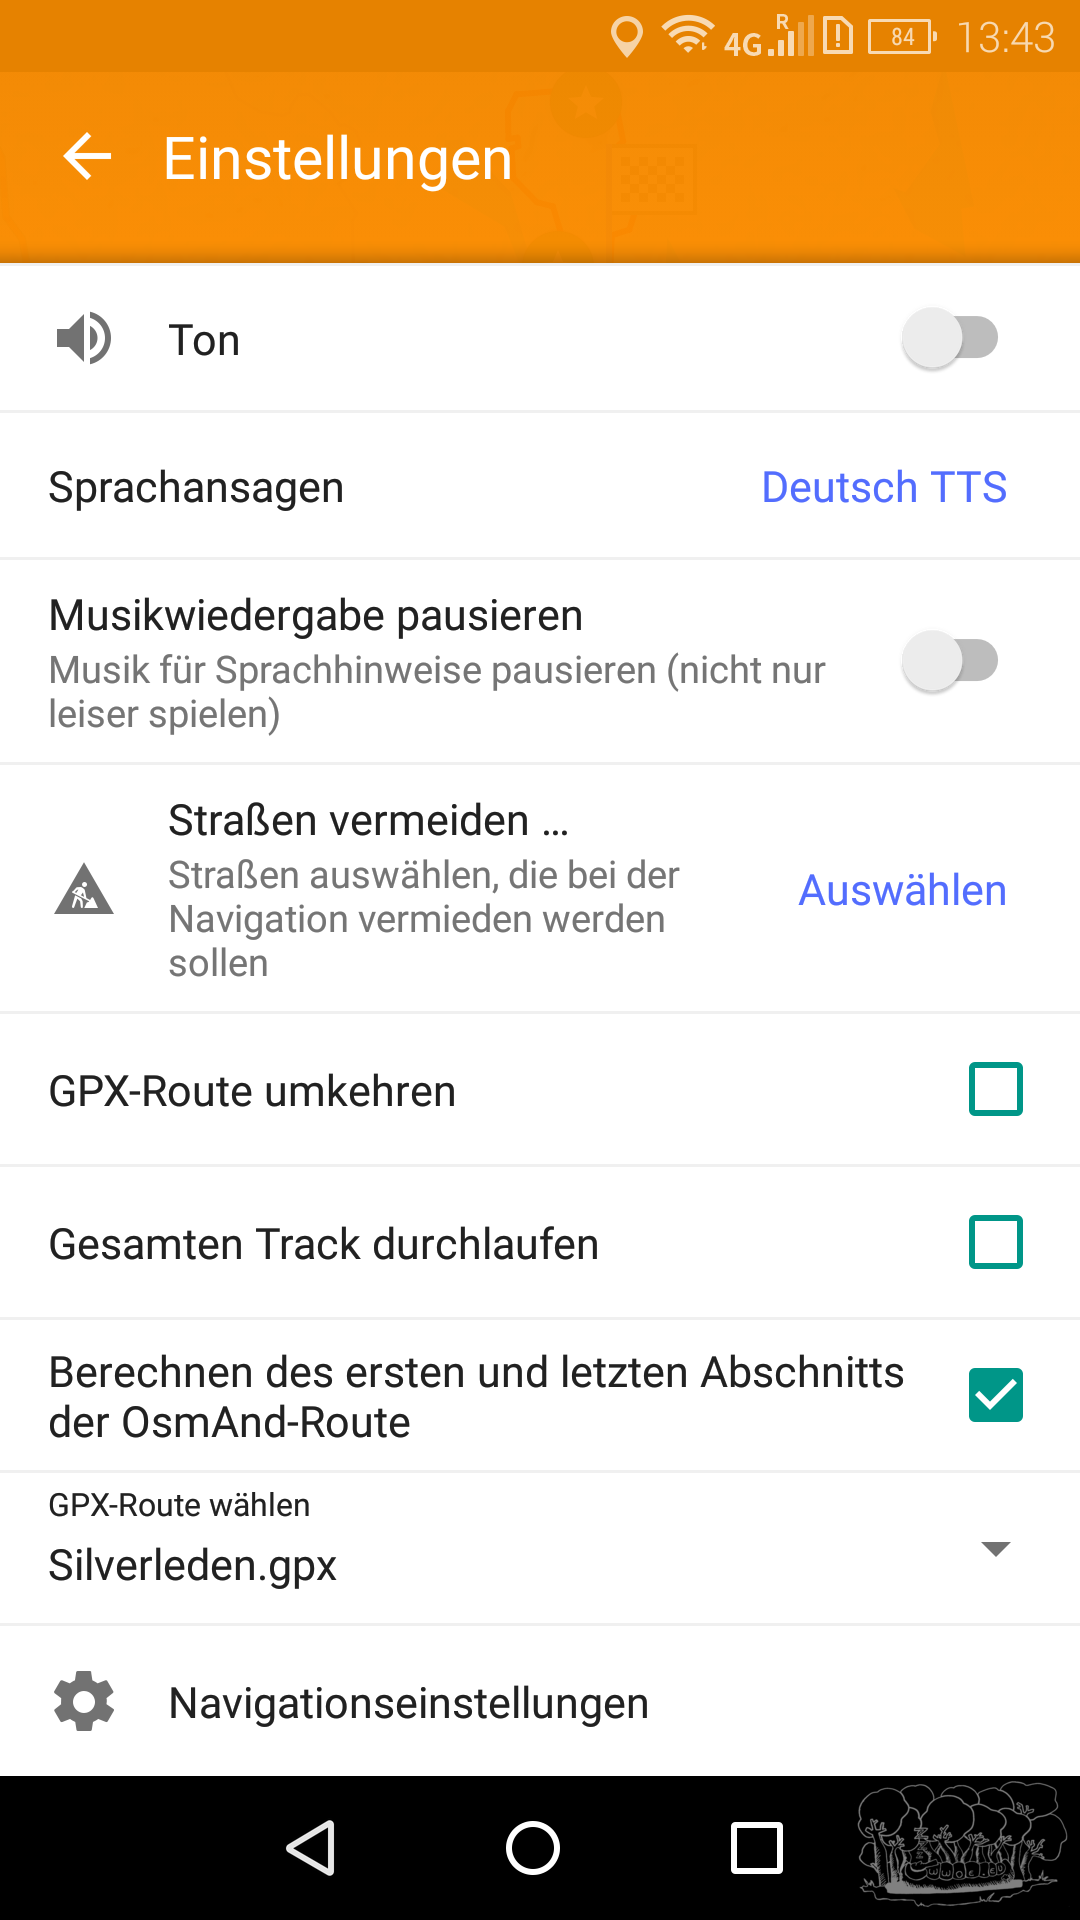
Here the item “Use GPX route” is particularly worth highlighting. When the GPX file has been selected here it will be used as best as possible for route guidance.
From now on the route finding is based on the GPX track. This way for example the distance from the current location to the campsite can be precisely determined.
Points of Interest (POI)
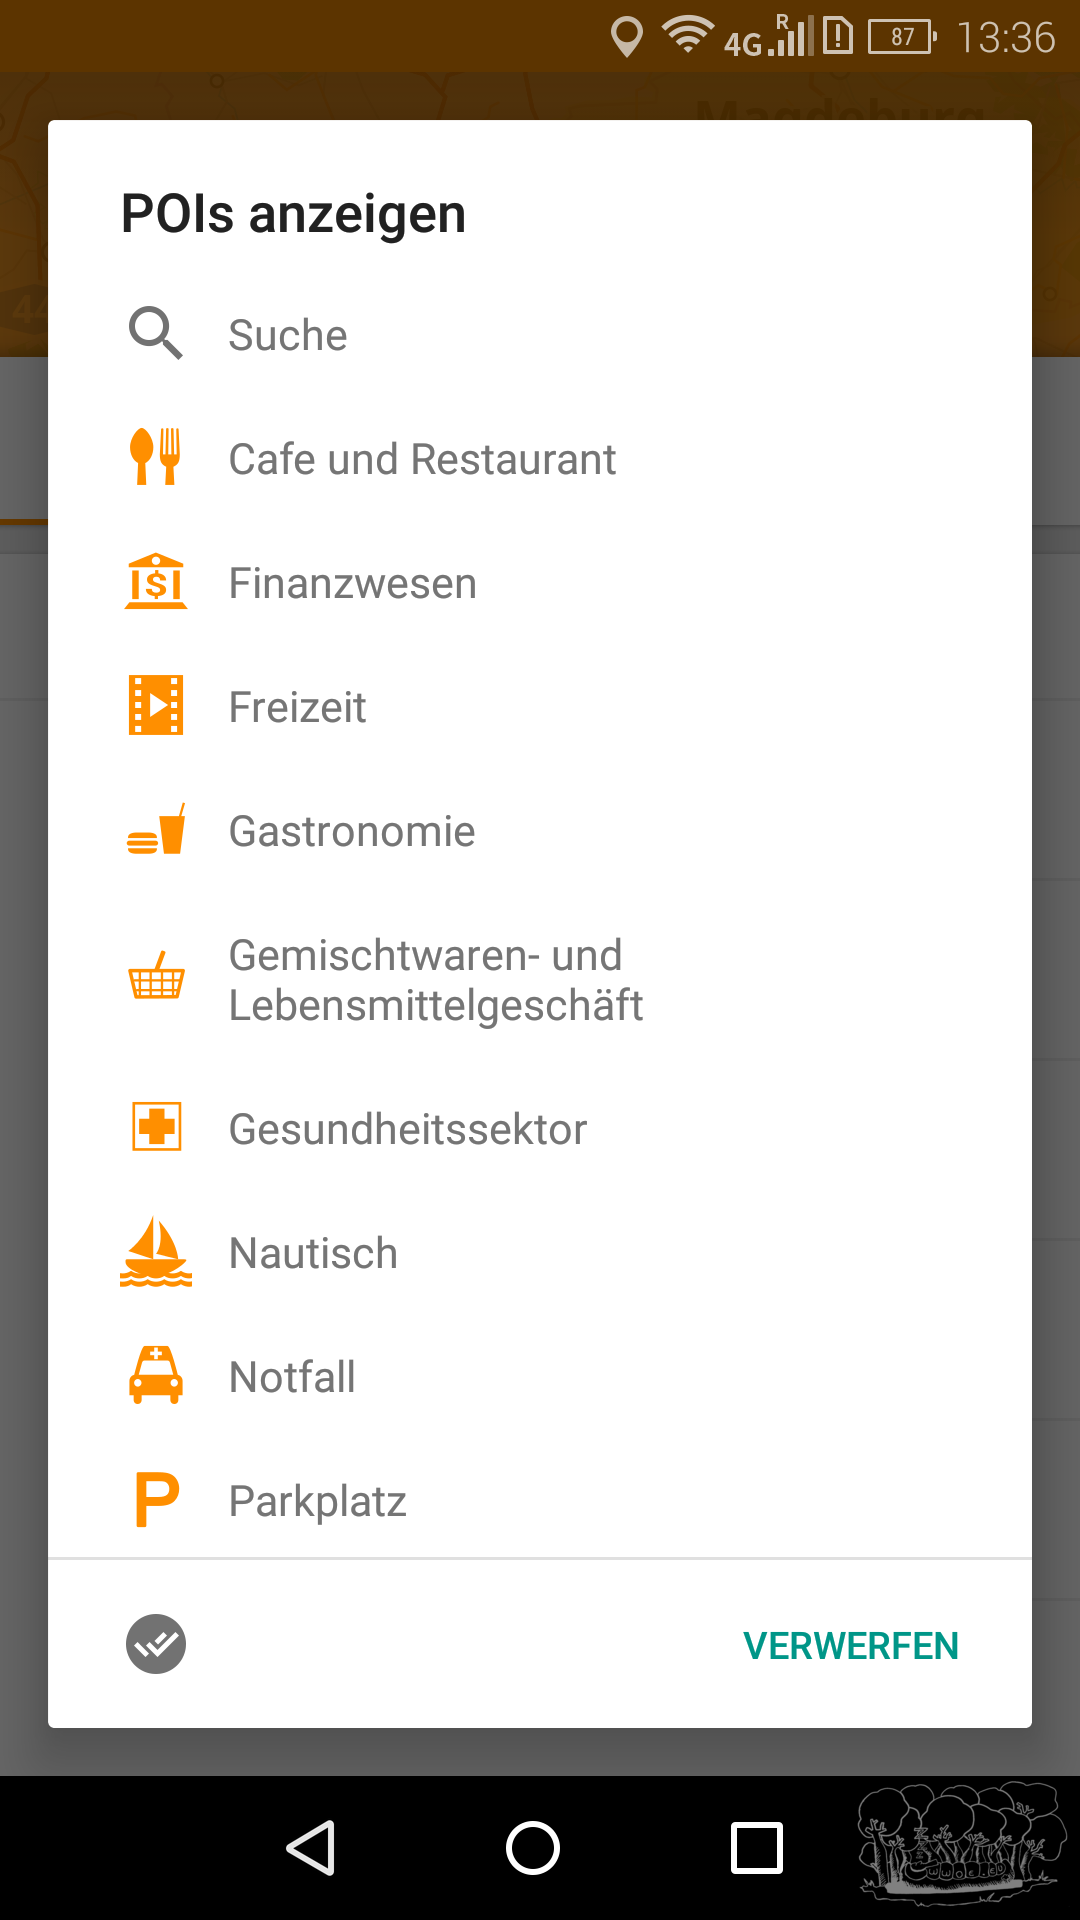
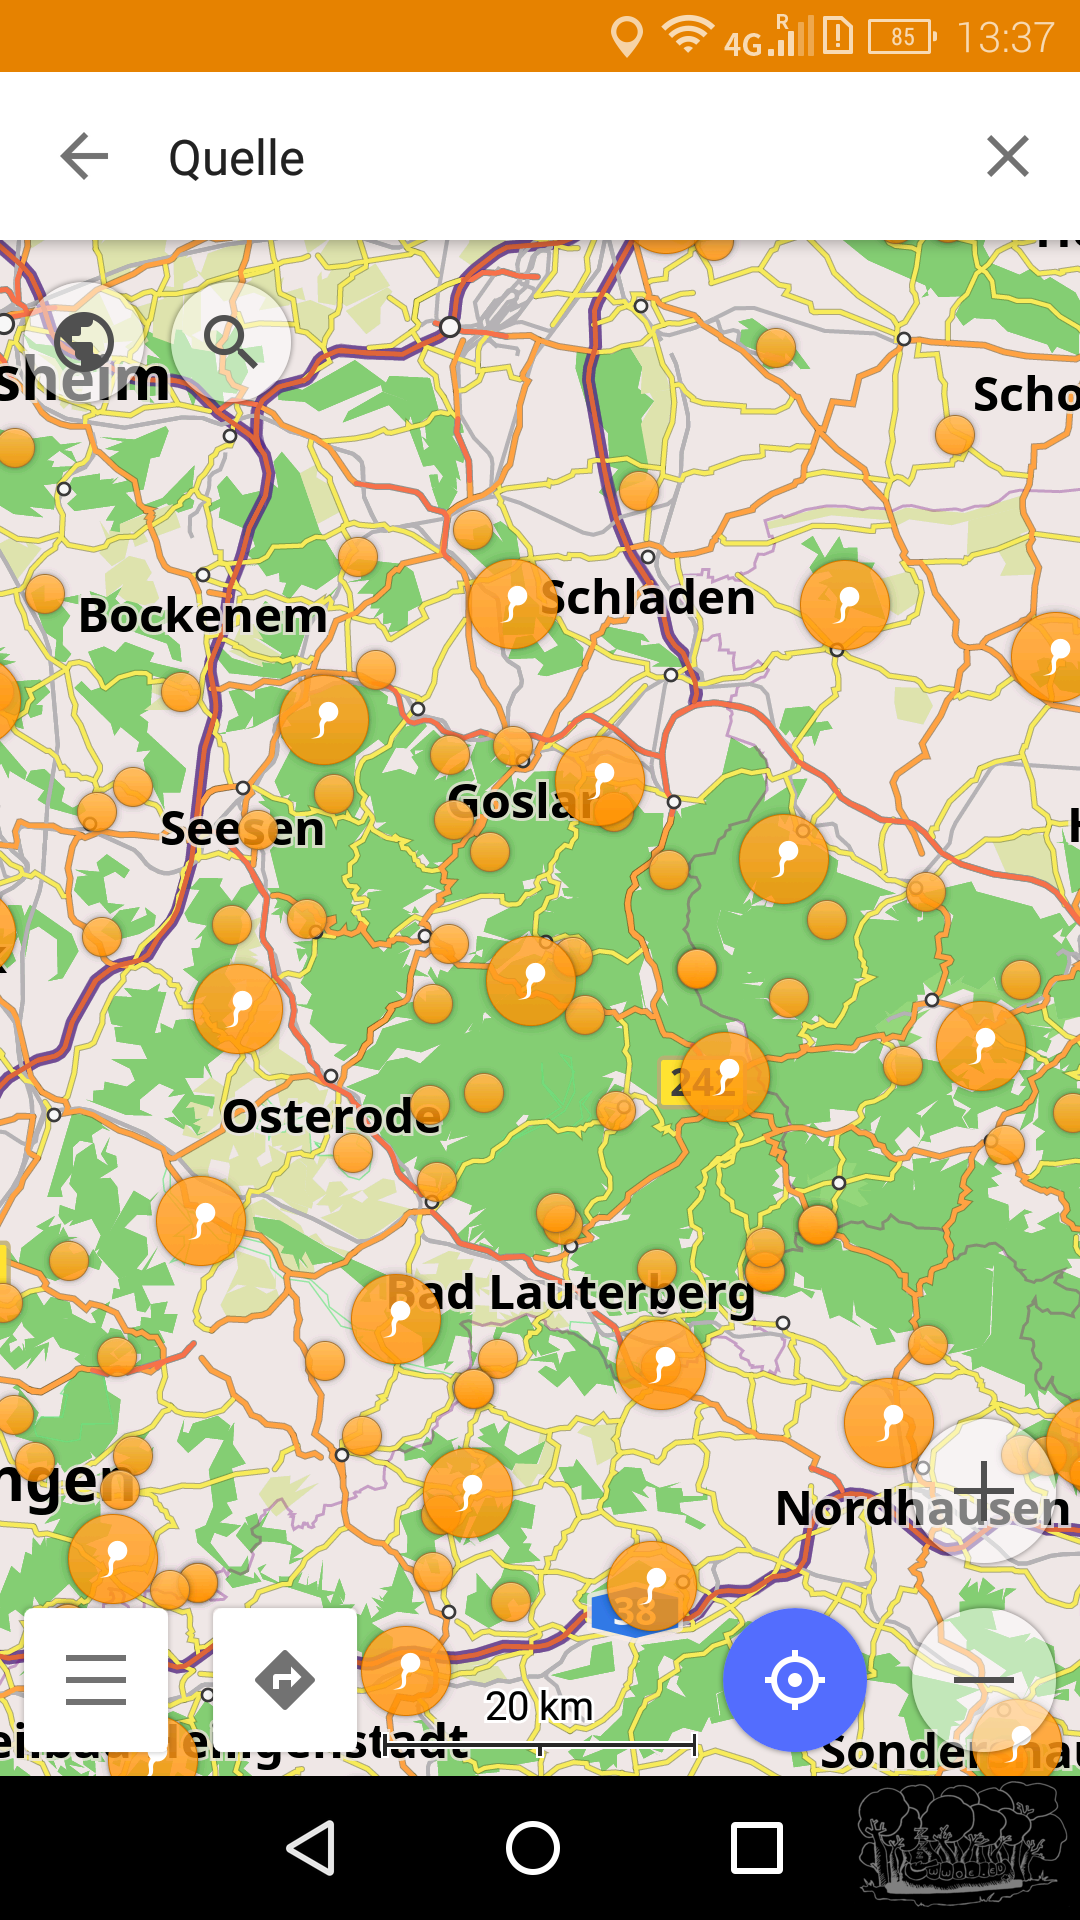
On the maps there are many different additional pieces of information such as grocery stores, restaurants, gas stations and more. In the map settings you can set which POIs are to be displayed on the map from a distance. There are some standard categories that can be activated there. Additionally there are further categories that are not directly available for selection. When hiking I also need the categories “Shelter” and “Spring” among others. Currently only one additional POI category can be displayed; to do this you have to go to the map settings via the burger menu. There under the item “Show POIs” there is a search function.
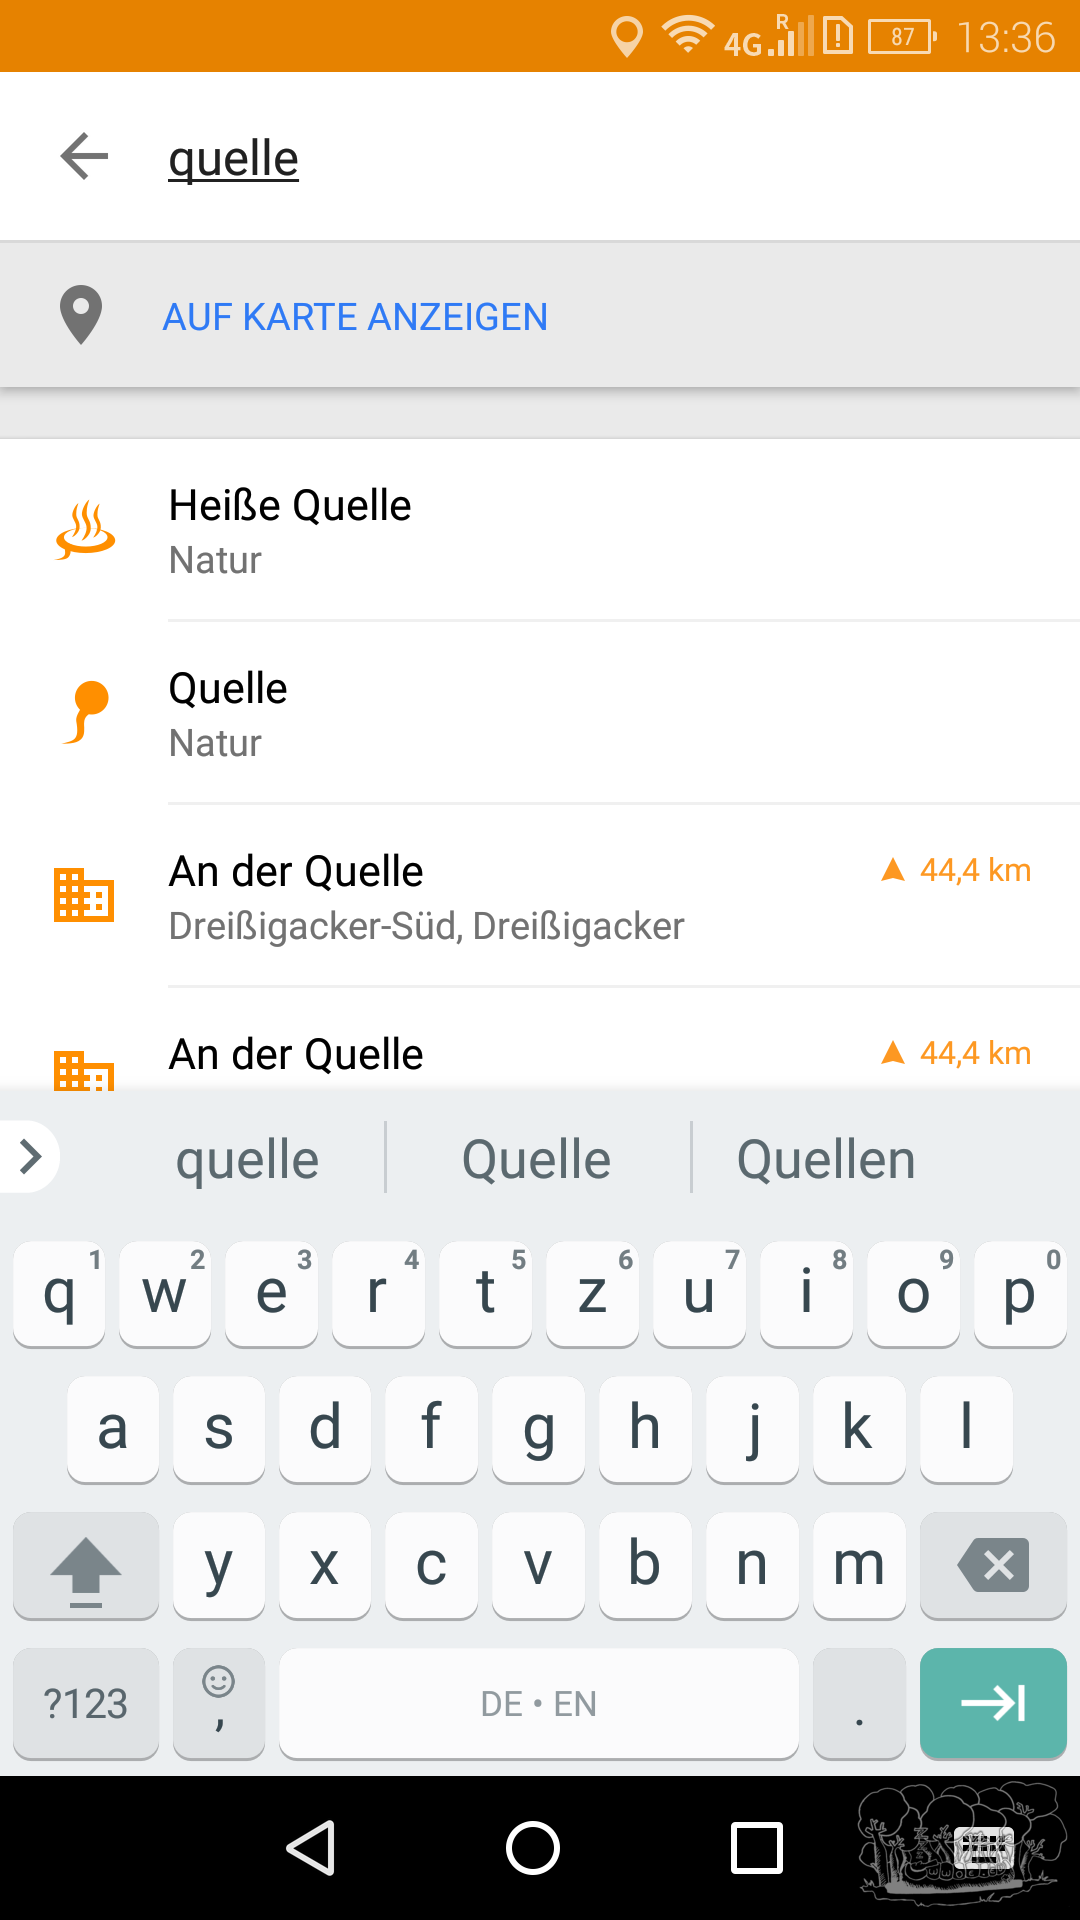
Enter the category name here.
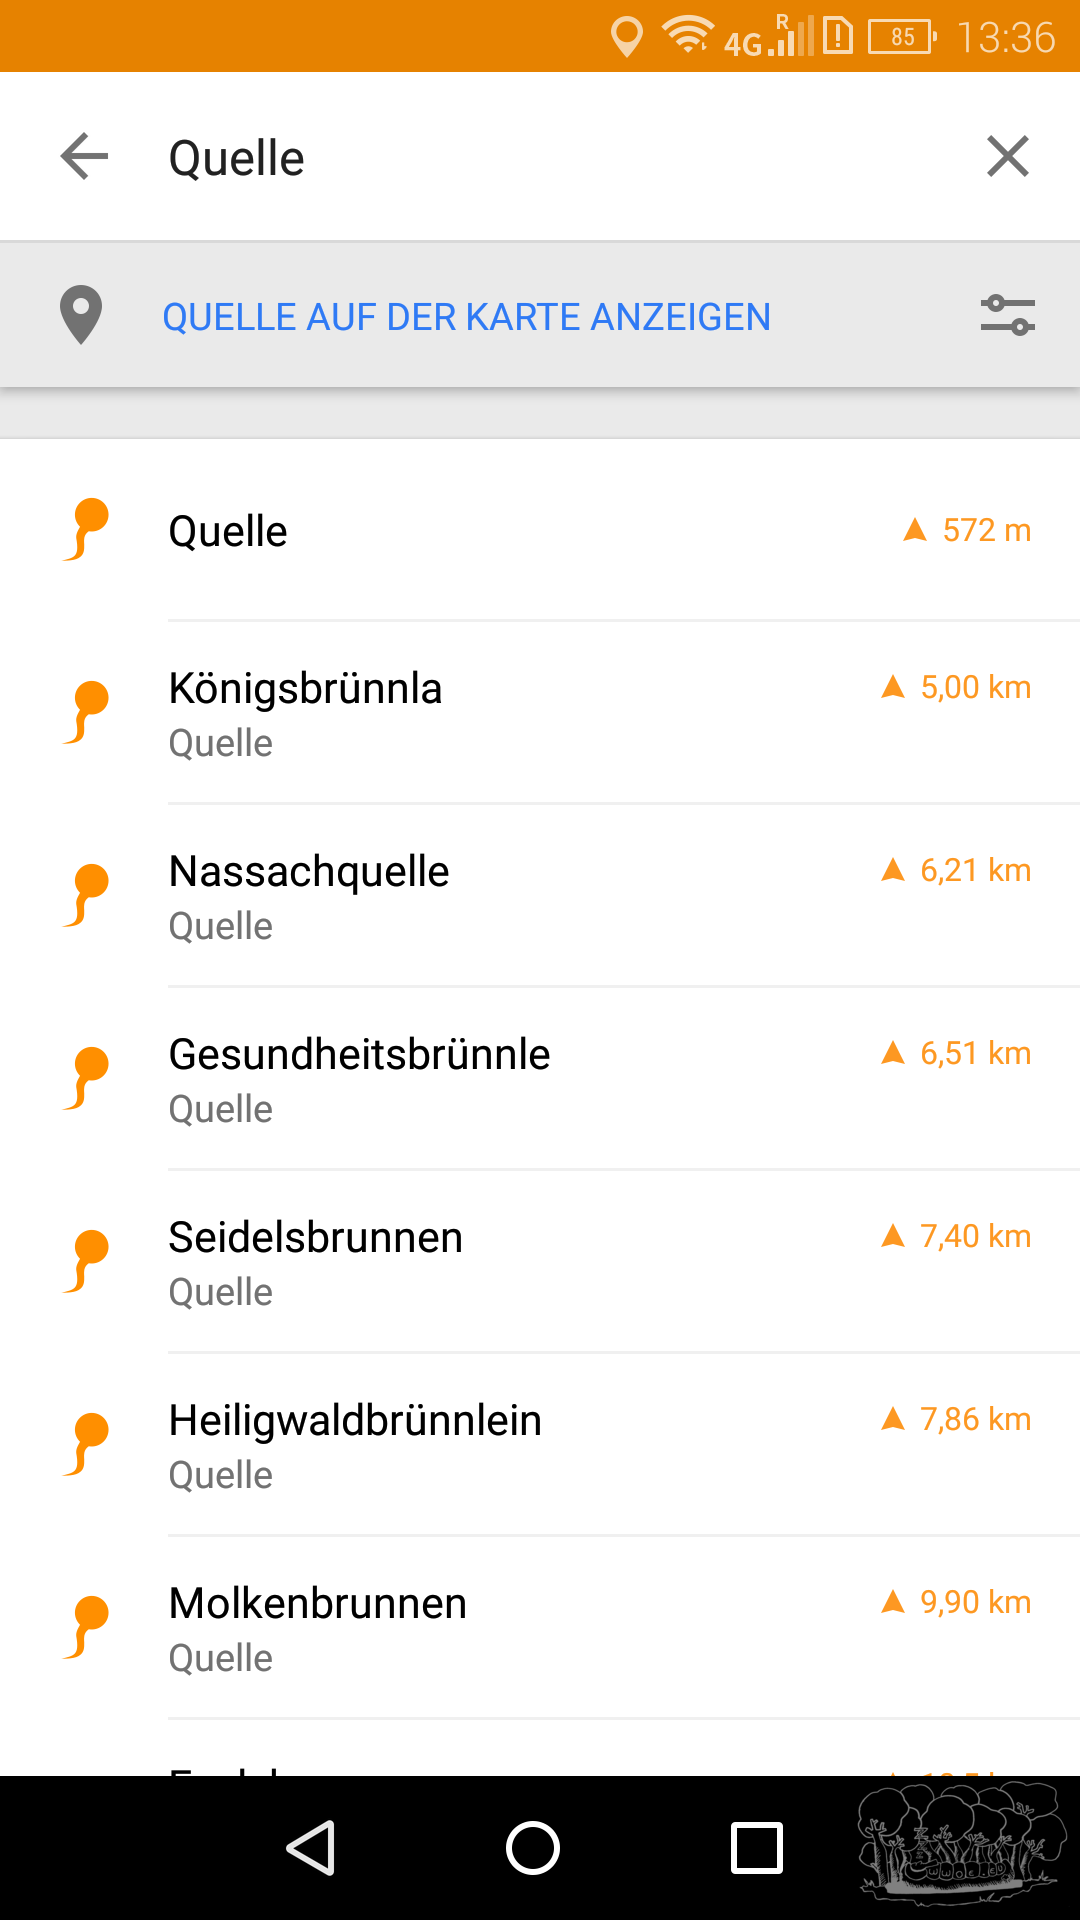
After the category has been found select it with a click. From now on only POIs of this type should appear in the list.
Below the search field there is now the button “Show [category] on the map”. With a click on this button this category will from now on be displayed on the map.
To minimize the search field click on the arrow to the left until the window disappears. From now on these POIs will also be displayed on the map. This way for example the search for water is greatly simplified since you can systematically search around the GPX track for springs or alternatives such as supermarkets or inns.
All in all OsmAnd+ is in my opinion the ideal app for hiking because it meets all my criteria and offers plenty of map material for a fair price. Only when driving I still prefer Google Maps with offline maps. This year too on my vacation in Sweden OsmAnd+ did not disappoint me.
Note: I am neither the developer of any of the apps described here nor involved in their sales through commissions or similar.